How to stop a Windows 10 update

Welcome to our guide on how to stop a Windows 10 update. Updating your PC is an important part of maintaining its general health and wellbeing. Windows 10 updates often contain fixes for critical problems, and installing them can keep your PC running smoothly.
But there are times when you may not want to install an update. A frequently used program of yours may not be compatible with the latest update; in that case, you may want to defer the update until you can find a suitable alternative.
So how do you stop a Windows 10 update? While you can’t stop it installing forever, there are ways to delay it for a while. In this guide, we’ll show you how it’s done.
1. Pause automatic updates
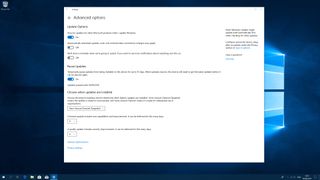
Click the Start menu, then the Settings cog. Now go to 'Update & Security', click 'Windows Update' on the left-hand side, then click 'Advanced options'. Under 'Pause Updates', toggle the switch to 'On'. This will pause Windows updates for 35 days, but you’ll need to download the latest updates once that period is over if you want to pause further updates.
You can also choose to defer feature updates by up to 365 days and quality updates (which contain important security fixes) by up to 30 days. Once these periods are up, you’ll need to download updates before you can defer them again.
2. Meter your network connection
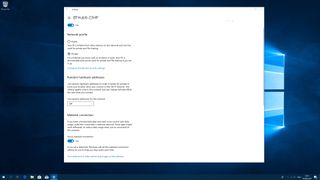
This is another simple thing to try. Click Start, then click the Settings cog. From here, click 'Network & Internet', then click 'Wi-Fi' in the left-hand column, then the name of your Wi-Fi connection. Scroll down to the 'Metered connection' section and toggle the 'Set as metered connection' switch to 'On'.
This tells Windows 10 that you’re on a limited data plan, with the result that it won’t automatically push updates to you (although you can still manually install them). However, if you’re on an Ethernet connection this method won’t work, so you’ll have to try one of the other methods in this guide.
3. Prevent a downloaded update from installing
Once an update has started installing, you shouldn’t stop it – doing so can be potentially dangerous for your PC. However, if Windows 10 has downloaded an update but hasn’t started installing it yet, you can still stop it.
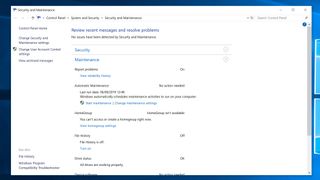
In the Windows 10 search bar, type 'Security and Maintenance', then click the first result to bring up the control panel window. Click the 'Maintenance' title to expand it, then scroll to the 'Automatic Maintenance' section. Click 'Stop maintenance' to halt the update.
If you change your mind and want to restart the update, simply click 'Start maintenance'.
4. Disable the Windows Update startup service
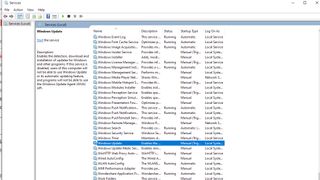
In the Windows 10 search bar, type 'Services'. Right-click the top result and select 'Run as administrator'. Scroll down the list until you reach the Windows Update entry. If the 'Status' column says "Running", right-click the Windows Update entry and click 'Stop'.
Now, right-click it again and click 'Properties'. In the resulting menu, under 'Startup type', choose 'Disabled', then click 'OK'.
This will prevent Windows Update from automatically installing updates. If you still want to prevent automatic updates but want to give yourself the opportunity to install updates manually, select 'Manual' from the drop-down menu instead.
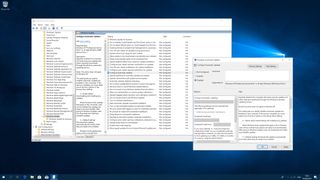
5. Disable updates using Group Policy
This involves a getting your hands a little dirty, but is easy enough. Type 'gpedit.msc' into the Windows 10 search bar and click the first result. Now navigate to the following path using the left-hand pane: 'Computer Configuration > Administrative Templates > Windows Components > Windows Update.' In the right-hand window, double-click 'Configure Automatic Updates'.
This will open a new window. In the top-left corner, click 'Disabled', then click 'Apply' and 'OK'. This will prevent Windows 10 from automatically downloading and installing updates, although you can still manually look for updates by opening Windows Update.
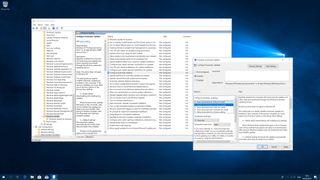
6. Limit updates using Group Policy
Alternatively, you can choose to limit Windows updates instead of disabling them. As in step 5, open gpedit.msc, navigate to 'Computer Configuration > Administrative Templates > Windows Components > Windows Update' and double-click 'Configure Automatic Updates'. This time, instead of 'Disabled', click 'Enabled'.
In the 'Options' box on the left-hand side, click the top drop-down box and choose from one of the following four options:
- Notify for download and auto install
- Auto download and notify for install
- Auto download and schedule the install
- Allow local admin to choose setting
The 'Notify for download and auto install' option is the closest to disabling automatic downloads.
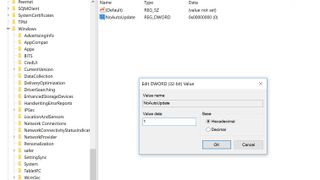
7. Disable updates using the Registry
Before dabbling in the Registry, make a backup of anything important, as making a mistake can cause problems for your PC.
Now, type 'regedit' into the Windows 10 search bar and click the top result. Navigate to the following path in the left-hand column: 'HKEY_LOCAL_MACHINE > SOFTWARE > Policies > Microsoft > Windows'.
Right-click on the Windows folder and click 'New > Key'. Name it 'WindowsUpdate' and press 'Enter'.
Right-click in this and click 'New > Key', then name this entry AU and press 'Enter'. On the right-hand side of this entry, right-click and click 'New > DWORD (32-bit) Value)'. Name this entry 'NoAutoUpdate' and press 'Enter'.
Once you’ve created this, double-click the new entry and change the 0 to a 1 in the 'Value data' box. Click 'OK' and restart your PC.
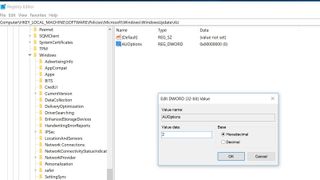
8. Limit updates using the Registry
You can limit Windows updates instead of disabling them in the Registry. To do so, follow step 6 above up to and including the point where you have created the AU entry.
Right-click the blank space on the right and click 'New > DWORD (32-bit) Value'. This time, name the entry AUOptions (instead of NoAutoUpdate) and press 'Enter'.
Double-click the entry; in the “Value data” box, delete the 0 and replace it with either 2, 3, 4 or 5.
These correspond to the numbers in step 5, meaning you’ll get the following results:
- 2 - Notify for download and auto install
- 3 - Auto download and notify for install
- 4 - Auto download and schedule the install
- 5 - Allow local admin to choose setting

Comments
Post a Comment