How to use an eGPU with a Mac
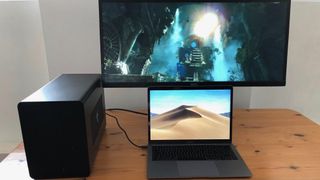
Apple has often been criticized for the limited upgrade options that are available in the various Mac and MacBook models, and some models don’t even allow you to upgrade the memory or storage, let alone improve performance by installing a new graphics card.
However, the high-speed Thunderbolt 3 interface that is now used in the latest Macs and MacBooks does allow you to boost your Mac’s graphics performance by connecting it to an ‘eGPU’ – or ‘external-GPU’ – that actually sits outside the Mac itself.
An eGPU is simply an empty box – called an ‘enclosure’ – that contains a PCI expansion slot for a graphics card and a power supply to drive the card. The enclosure will also have a Thunderbolt 3 port for connecting it to your Mac (and most eGPUs are also compatible with Windows PCs that have Thunderbolt 3 as well).
There are several companies that make eGPU enclosures, with the Core X enclosure that we use in this guide having been loaned to us by the kindly gaming gurus at Razer.
The one drawback with buying an empty enclosure such as this is that you also need to buy and install the graphics card yourself, so bear that in mind when calculating the combined cost of the eGPU enclosure and graphics card together.
There are a handful of eGPU models that do include a pre-installed graphics card, but these aren’t much cheaper than the DIY option that we look at here, and do limit your choice of graphics card as well.
1. What you need
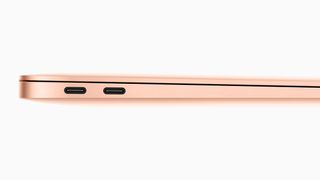
Apple’s guidelines for using an eGPU state that you need a Mac that is equipped with Thunderbolt 3, and running High Sierra (macOS 10.13.4) or later.
But even the entry-level Mac mini has Thunderbolt 3 now, so this is a great way of upgrading less expensive Mac models, or a lightweight laptop such as the MacBook Air.
However, there is one other important limitation that you need to bear in mind. Apple and nVidia don’t seem to get along for some reason, so the macOS itself currently only works with graphics cards from AMD, such as the Radeon RX 570 loaned to us by Razer along with the Core X enclosure.
2. Core values
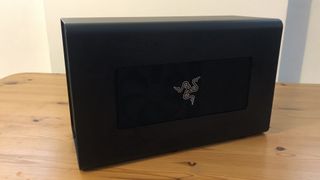
The Core X is one of the more affordable eGPU enclosures currently available, costing £260/$300/AU$469.
It’s primarily designed for use with laptops, but there’s no reason why you can’t use it with a desktop Mac if you want. Just remember that most eGPU enclosures are sold without a graphics card, so you still have to provide the graphics card yourself.
That adds to the overall cost of your graphics upgrade – but the use of the external enclosure provides a terrific upgrade that wouldn’t normally be available for a laptop computer, or a small-form-factor machine like the Mac mini.
3. Installing the graphics card
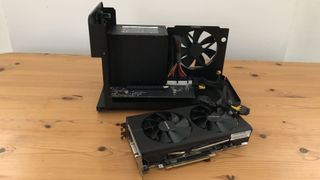
When you open up the Core X enclosure you’ll see the PCI slot for installing your shiny new graphics card, along with the bulky black power supply box, cooling fan, and power cables that connect to your awesome new graphics card.
Some high-end graphics cards need a lot of power, so before buying any eGPU enclosure you should check to make sure that its internal power supply provides enough power for the graphics card that you intend to use.
And, rather handily, Razer’s Core X also provides enough power to charge a laptop via its USB-C connector as well.
4. Connecting it all up
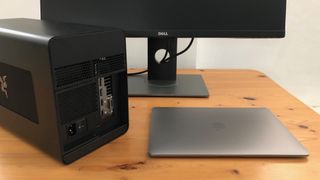
The macOS assumes that you’ll be using your Mac and eGPU with a large external monitor, as that will be better for playing games or doing serious design work than the smaller built-in display of a MacBook laptop.
And, of course, a model like the Mac mini will need you to provide an external display anyway. Whatever type of Mac you have, you’ll find that the Core X includes a USB-C cable that connects one of the Thunderbolt 3 ports on your Mac to the Thunderbolt 3 port on the back of the enclosure.
You can then use a standard HDMI or DisplayPort cable to connect the graphics card to your external monitor. That puts the three devices in a chain, with the Mac connected to the eGPU, and the eGPU connected to the external monitor.
5. Plug and Play
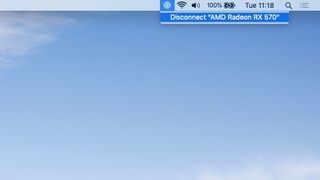
Once all the cables are connected and the power is turned on for all your devices, you’ll see that your Mac automatically detects the eGPU and displays a new icon for the eGPU in its main menu bar.
By itself, this icon simply tells you that there’s an eGPU connected, but if you click on the icon then you are given the option to disconnect the eGPU.
This is handy if you’re using a laptop as it allows you to disconnect the laptop from the eGPU without having to shut everything down. You can just unplug the USB-C cable and then pick up the laptop and go out for lunch.
One other thing to note – if you look at the battery icon in the menu bar you can see that the USB-C cable from the eGPU is charging the laptop as well.
6. Multiple screens
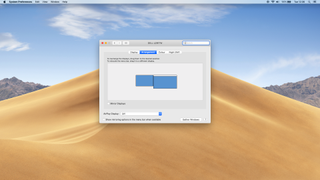
If you’re using a MacBook laptop, then you now have two screens to play with – the built-in screen of the laptop itself, and the separate external display that is controlled by the eGPU.
Go to the Display control panel in System Preferences, and then click on the ‘Arrangement’ tab. Here you can see the two displays side by side, with the larger desktop display (on the right) acting as an extension of the MacBook’s internal display (left).
There is also an option to ‘mirror’ the two screens so that you see the same thing on both screens at the same time – although this can affect performance so it’s not a great idea when playing games or running heavy-duty graphics apps.
7. Screen controls
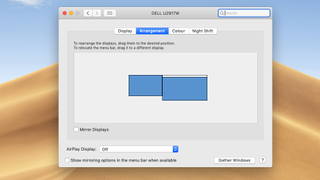
You can even control which apps appear on each screen. If you look at the two screens on the ‘Arrangement’ window you’ll see a little white menu bar running across the top of the left-hand window that represents the laptop’s built-in display.
But if you click on this menu bar and drag it across onto the right-hand (external) screen then the external display takes over as the laptop’s ‘primary’ display. By default, the macOS will launch apps onto the primary display and use the Radeon graphics card in the Core X to speed everything up.
However, you can still drag individual apps across onto the laptop’s internal display – which will leave them using the laptop’s integrated graphics instead.
8. The eGPU in action

Now you can start to see the improvement in the MacBook’s graphics performance. The integrated UHD 617 graphics built into the MacBook Air is pretty useless for playing 3D action games such as Rise Of The Tomb Raider – in fact, it could only manage 11fps when running Tomb Raider on its Lowest graphics setting at 1920x1080 resolution.
The game’s Medium setting dropped to 7.3fps, and then the game just completely crashed when we turned it up to Very High. But the developers at Feral Interactive recently updated the Mac version of Rise of The Tomb Raider to support eGPU acceleration – and the difference was immediately obvious.
With 8GB of video memory to play with, the Radeon RX 570 inside the Core X was able to crank the graphics right up to the Very High setting, and then cruise along at a smooth and playable 41.65fps.
9. Professional power
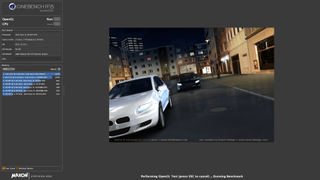
That’s gaming taken care of, but an eGPU like the Core X can work well with professional-level graphics and video software as well.
Using just its integrated graphics, the MacBook Air could only manage 32.4fps when running the Cinebench rendering test, but that performance doubled to 65.3fps with the Core X.
The Unigine Heaven benchmark is another good test of graphics performance, and using the Core X produced even more dramatic results here, increasing performance using the app’s Extreme HD settings from just 5.7fps to a healthy 34.5fps.
10. Accelerating the built-in display
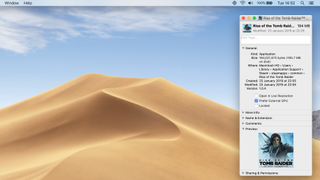
Depending on the apps or games that you use it may also be possible to use the eGPU to accelerate the built-in screen on a MacBook laptop so that you don’t need to use an external monitor.
Before launching any app you can Control-click on its icon and select 'Get Info' from the context menu that appears. Some apps will have an option to ‘Prefer External GPU’, which will always use the eGPU even when running on the MacBook’s built-in display (rather than using its slower integrated graphics).
However, games and other apps do need to be updated to provide this option, so some apps may still need an external display in order to run at full speed with the eGPU.

Comments
Post a Comment