How to take a screenshot on a Mac

If you've ever wondered how to take a screenshot on a Mac or MacBook, then you've come to the right place, as we explain all the ways you can take a screenshot on a Mac.
The latest version of the Mac operating system, macOS 10.14 Mojave, features revamped screenshot and screen recording tools.
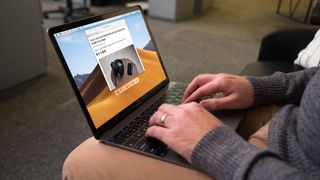
When you take a screenshot (by holding Shift + Command (⌘) and pressing 3 or 4 on your keyboard), a thumbnail appears at the bottom right of the screen for a moment, similar to iOS.
Click the thumbnail to open the screenshot in the Markup tool, where you can crop, rotate and annotate it, or share it with someone or send it to an app immediately.
Ctrl-click the thumbnail to reveal shortcuts that send the screenshot to a popular folder or app, or to reveal the file in the default folder for shots.
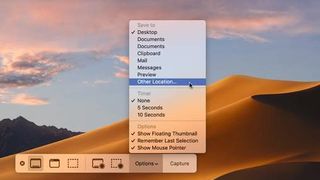
That folder and other options can be set by pressing Shift + Command (⌘) + 5 to call up a new toolbar. (You can drag the thumbnail to where it’s needed, too.)

The screenshot toolbar
The first three icons from the left set what’s grabbed in a static screenshot: the whole desktop, a portion you drag through, or just a window.
The next two record video of the whole or a portion of the screen. Toolbar getting in the way? Drag it from the space above or below the X that closes it.
Turn off the thumbnail
Click 'Options' and untick 'Show Floating Thumbnail'. You can hide the cursor in static shots/indications of clicks during videos from this menu, too.
Set a countdown
The options menu also provides the option of a 5- or 10-second timer between you initiating a screenshot capture and it happening.
Capture video with sound
Recordings are soundless by default. With a video mode selected, the menu gains an option to record sound from your Mac’s microphone.
Screenshot options
You no longer need to use a Terminal command to choose where Mac screenshots are saved! The options menu includes popular locations as presets, or you can pick another.
Remember last selection
For modes that capture just part of the desktop, leave 'Remember Last Selection' turned on to grab the same area each time, or turn it off if you prefer to select an area from scratch.
How to take screenshots on older Macs and MacBooks
If you have an older Mac or MacBook that doesn't have macOS 10.14 Mojave installed, then the process for taking a screenshot is slightly different, so read on to find out how to take a screenshot on a Mac running macOS 10.13 High Sierraor earlier.
Save the entire screen on the desktop
To take a screenshot on a Mac of the whole screen, press Command (⌘) + Shift + 3, which will place a screenshot file on your desktop saved as a .png file.
Take a screenshot of part of the screen
If you're only interested in taking a screenshot of part of the screen, hold down Command (⌘) + Shift + 4 to turn the cursor into a crosshair pointer.
Move it to where you want to start the screenshot and left-click, before dragging the rectangle over the desired area while holding the mouse button. Let go to turn the selected area into a .png file on the desktop.
Take a screenshot of a window
To precisely take a screenshot of a window and its contents on a Mac, press Command (⌘) + Shift + 4 to turn the cursor into a camera pointer before pressing the Space bar on your keyboard.
Move the camera pointer over the window to highlight it and left-click to save the screenshot as a .png file on the desktop. you can hit escape before you click to cancel the screenshot.

How to take a screenshot of a menu on a Mac
It's also possible to take a screenshot of a menu without the title using another handy combination. Hold down Command ⌘ + Shift + 4, press the Space bar and left-click on the menu to send it to your desktop in the form of a .png file.
Change the default format and save location of screenshots
If you're using a version of macOS earlier than macOS Mojave, then follow these instructions to change the type and location of the files.
OS X saves screenshots as .png files by default, which can be changed to .jpg by inputting the following command into Terminal:
defaults write com.apple.screencapture type jpg
It doesn't have to be .jpg either - you can switch the file format to a number of supported extensions such as PDF, tiff, or bitmap, among others, by entering it at the end of the line.
To change the location enter in the following command:
defaults write com.apple.screencapture location
Then, enter in the path of the new folder you want to save the screenshots into, or drag and drop it into the Terminal window.
When you're done, enter this command to load the new setting:
killall SystemUIServer
How to annotate screenshots using Preview
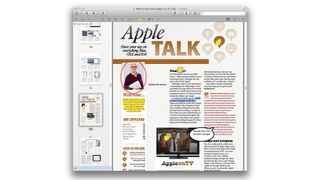
As well as letting you crop, resize and tweak screenshots, Preview has some nifty built-in annotation features that come in useful for placing instructional (or other) text over them. Make sure the Edit Toolbar is visible (from the View menu) and you'll see options for drawing shapes, speech, thought bubbles and more.
For creating instructions out of screenshots, the arrow tool will come in particularly useful. There's also the option to highlight text in different colours, strikethrough some text, add notes and type some text into boxes.
How to take a screenshot on a Mac using a Windows keyboard
If you use a Windows keyboard with your Mac, you can still use the keyboard shortcuts listed above. However, as Windows keyboards do not have the Command (⌘) key, you need to press the Windows key (which holds the Windows icon).

Comments
Post a Comment