The ultimate guide for installing the Google Play Store on Amazon Fire tablets

Amazon's Fire tablets are unique, not just because they're extremely cheap, but also because they don't come with the Google Play Store. Instead, you get access to the Amazon Appstore, which might not have the exact app you're looking for. For example, Chrome and YouTube aren't available.
Thankfully, the Play Store can be installed on Fire tablets in around 10 minutes, and you don't even need a separate PC. This is the ultimate guide to installing the Play Store on Fire tablets, with detailed instructions for every model produced since 2014.
We have updated this guide with additional troubleshooting tips and clearer instructions.
Enable installation from unknown sources
The first step in this process is to enable apps to be installed from outside the Amazon Appstore. This allows you to open and install applications from downloaded APK files.
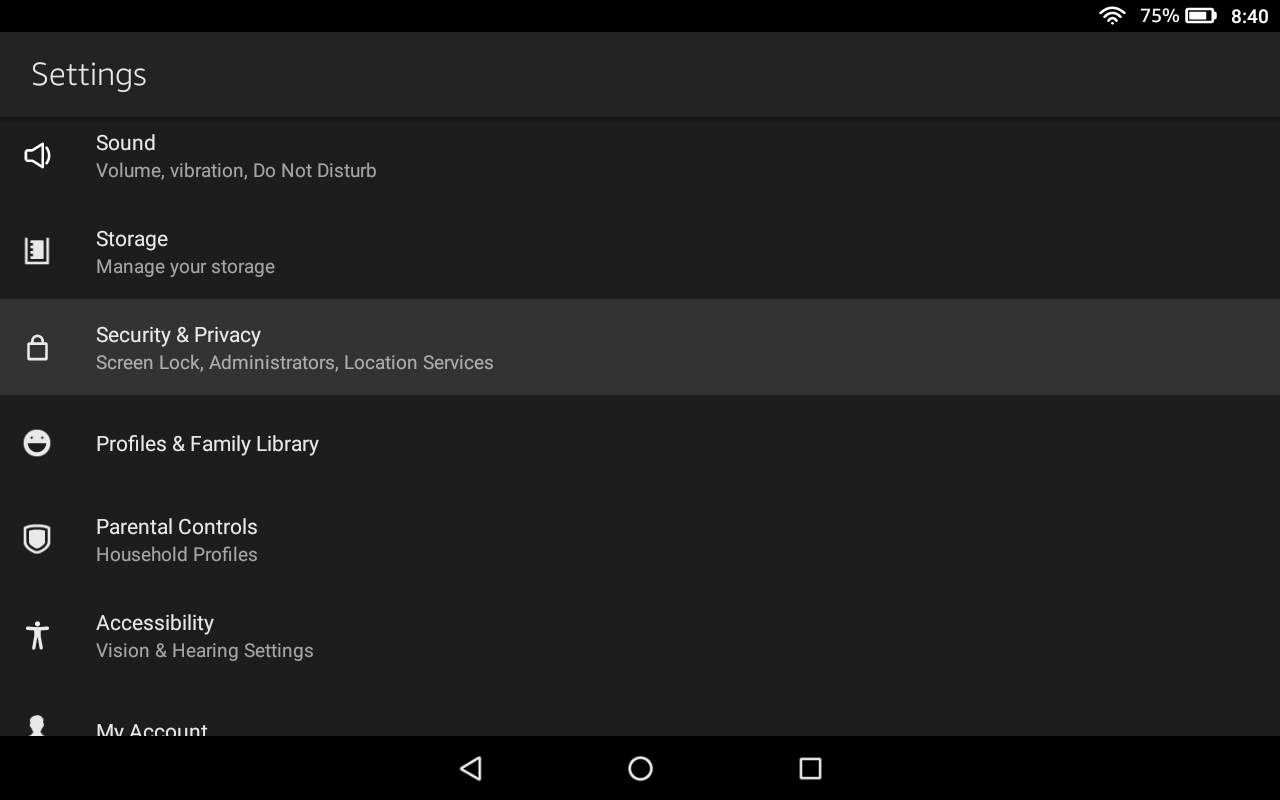
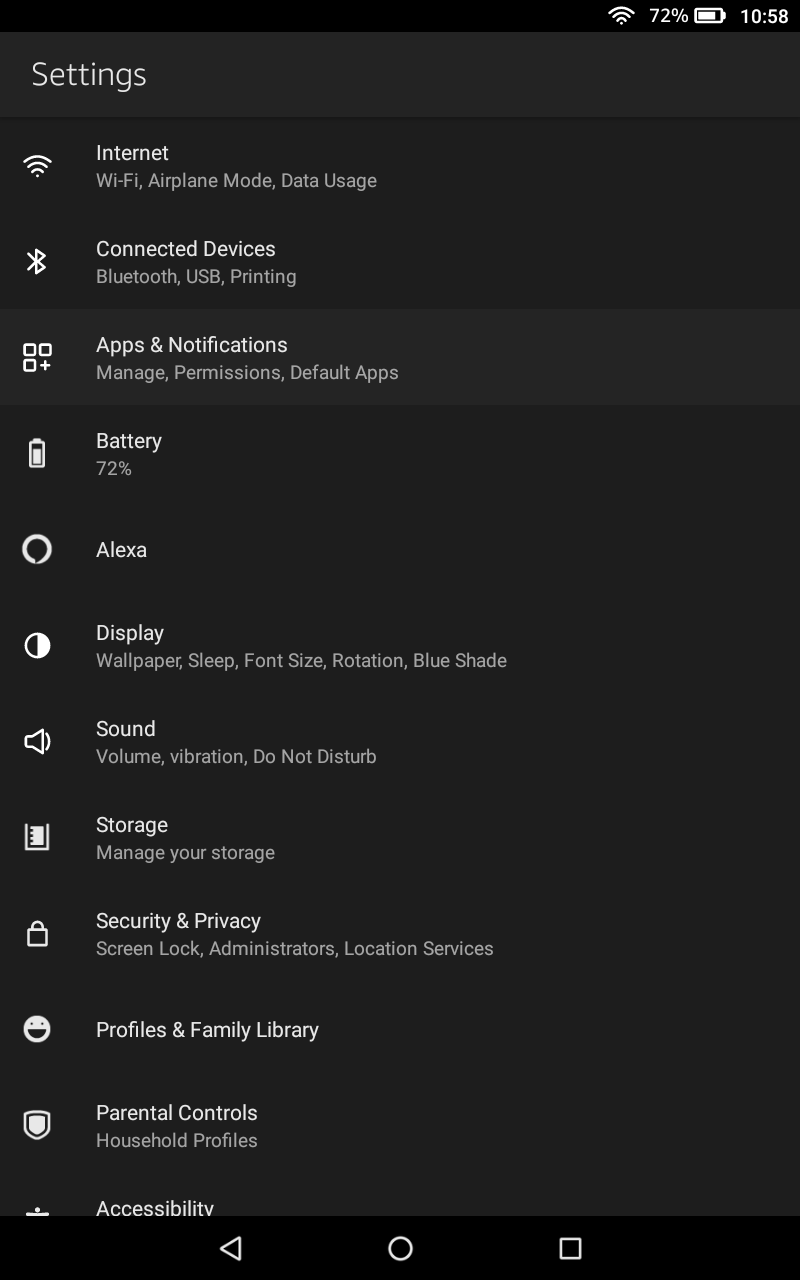
First, go to the main 'Home' page on your home screen and open the Settings app. If you just got your tablet, it's probably near the bottom of the list. Then tap the 'Security & Privacy category (older models might just say 'Security'), find the switch for 'Apps from Unknown Sources,' and turn it on.

This process is slightly different on newer Fire tablets. If tapping 'Apps from Unknown Sources' brings up a list of apps, find the Documents app on the list and slide the switch to ON for 'Allow from this source'.
Now you're ready to download and install the APKs needed to get the Google Play Store running.
Install the Play Store
The next step is to download the proper APK files for the Play Store. You technically have to install four different applications — Google Account Manager, Google Services Framework, Google Play Services, and finally the Google Play Store. The first three apps handle basic account services and add APIs, while the last app is the store itself.
Because different Fire tablets run different versions of Android with varying hardware, the exact APKs you have to install depend on what Fire tablet you have.
If you're not sure which model you have, open the Settings app again, tap on 'Device Options & System' (it might also just be called 'Device Options'), and look at what is listed under 'Device Model.
If you're not already reading this on your Fire tablet, open the Silk web browser and type andp.lc/firetabletplay into the address bar to jump straight to this post.
Fire HD 10 (9th Gen, 2019)
The steps for the latest Fire HD 10 are a little different than the steps for other models, since it's running newer Android software. Go to each of the below pages and tap the main Download buttons, but do not open the downloaded files yet.
For these last two links, select the version closest to the top of the list which doesn't have "beta" in the name. Again, don't open the files yet.
Now it's time to install the apps. Open the Documents app on your tablet (it might also be called 'Docs'), select your tablet's Download folder, and open the apps in the below order.
- com.google.gsf.login
- com.google.android.gsf
- com.google.android.gms
- com.android.vending
Once you have installed all four apps, hold down the power button, and tap 'Restart' to restart your tablet. Once it has booted back up, open the Play Store from the home screen and see if it works
Fire 7 (9th Gen, 2019)
Here are the download links for the ninth-generation Fire 7 tablet, released in 2019. Go to each page, tap the main Download button, wait for the file to finish downloading, and then open it. After each installation is complete, tap the Done button, not the Open button.
For these last two links, select the version closest to the top of the list which doesn't have "beta" in the name. After each installation is complete, tap the Done button, not the Open button.
Once you have installed all four apps, hold down the power button, and tap 'Restart' to restart your tablet. Once it has booted back up, open the Play Store from the home screen and see if it works.
Fire HD 8 (8th Gen, 2018)
Here are the download links for the eighth-generation Fire HD 8. Go to each page, tap the main Download button, wait for the file to finish downloading, and then open it. After each installation is complete, tap the Done button, not the Open button.
For these last two links, select the version closest to the top of the list which doesn't have "beta" in the name. After each installation is complete, tap the Done button, not the Open button.
- Google Play Services (64-bit ARM, nodpi, Android 6.0+)
- Google Play Store (universal, nodpi)
- Once you have installed all four apps, hold down the power button, and tap 'Restart' to restart your tablet. Once it has booted back up, open the Play Store from the home screen and see if it works.
Fire HD 10 (6th & 7th Gen), Fire HD 8 (6th & 7th Gen)
If you have an older Fire HD tablet, not to worry, it can run the Play Store just as well as newer models. Go to each of the below pages, tap the main Download button, wait for the file to finish downloading, and then open it. After each installation is complete, tap the Done button, not the Open button.For these last two links, select the version closest to the top of the list which doesn't have "beta" in the name. After each installation is complete, tap the Done button, not the Open button.Once you have installed all four apps, hold down the power button, tap 'OK' to power off, and turn your tablet back on by holding down the power button again. Once it has booted back up, open the Play Store from the home screen and see if it works.Fire 7 (5th, 6th, & 7th Gen), Fire HD 8 (5th Gen), Fire HD 10 (5th Gen), Fire HD 6 (4th Gen), Fire HDX 8.9 (4th Gen)
We haven't tested the Play Store on these models ourselves, but according to Amazon's device specifications page, they all run Fire OS 5 (based on Android Lollipop) with 32-bit processors, so they should work with the below APKs. Cross your fingers.Go to each of the below pages, tap the main Download button, wait for the file to finish downloading, and then open it. After each installation is complete, tap the Done button, not the Open button.For these last two links, select the version closest to the top of the list which doesn't have "beta" in the name. After each installation is complete, tap the Done button, not the Open button.Once you have installed all four apps, hold down the power button, tap 'OK' to power off, and turn your tablet back on by holding down the power button again. Once it has booted back up, open the Play Store from the home screen and see if it works.Fixes for common problems
If the Play Store or other Google apps aren't working correctly, here are some fixes for common issues."This account already exists on your device"
If you get the error "This account already exists on your device" when signing into Chrome or another Google app, or if the app won't detect your Google account at all, follow these steps:- Completely close the app you're having issues with (e.g. swipe it away in the Recents/multi-tasking screen).
- Open the Settings app, tap Apps & Permissions, then select 'Manage all applications.' These options might have different names, depending on your version of Fire OS.
- Find the app you're having issues with in the list, tap on it, and select 'Permissions'.
- Switch all available permissions to 'On'. Enabling the Contacts permission alone did the trick in my testing, but you might as well enable everything for good measure.
- Open the app again.
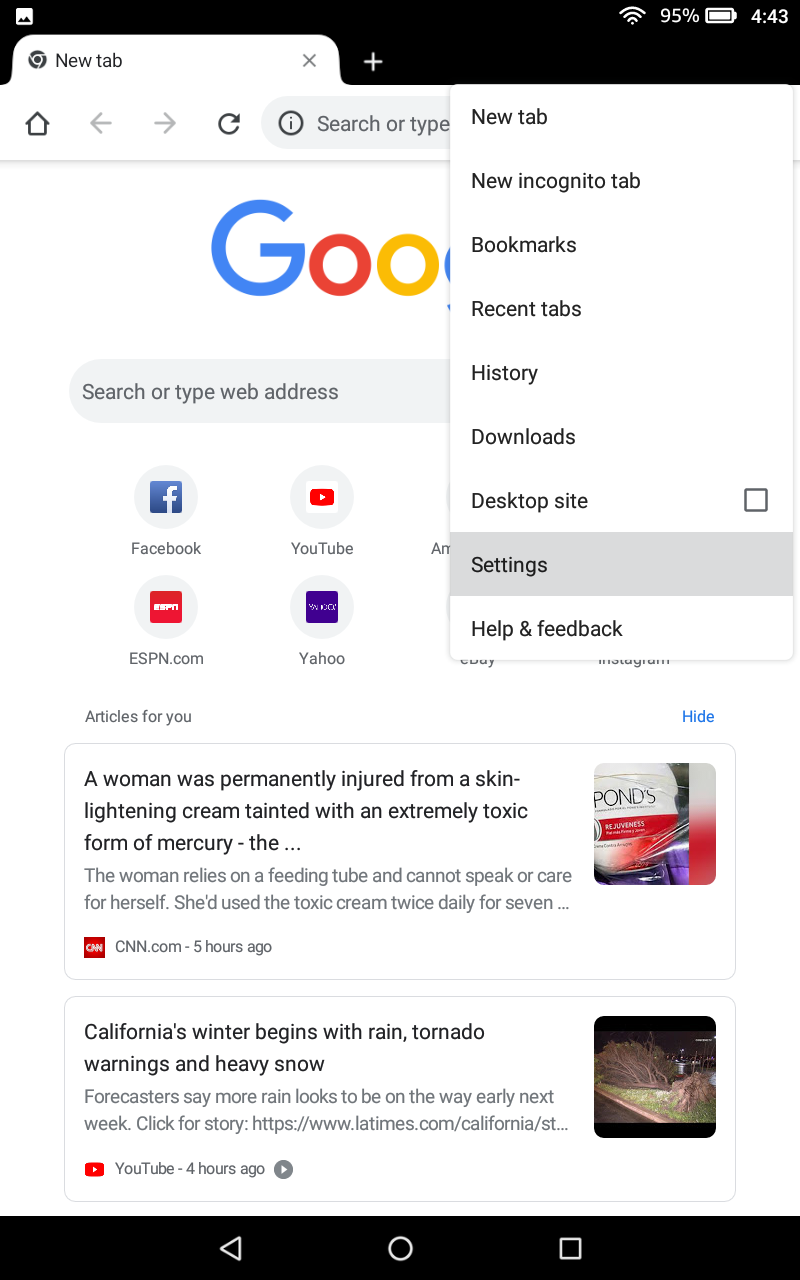
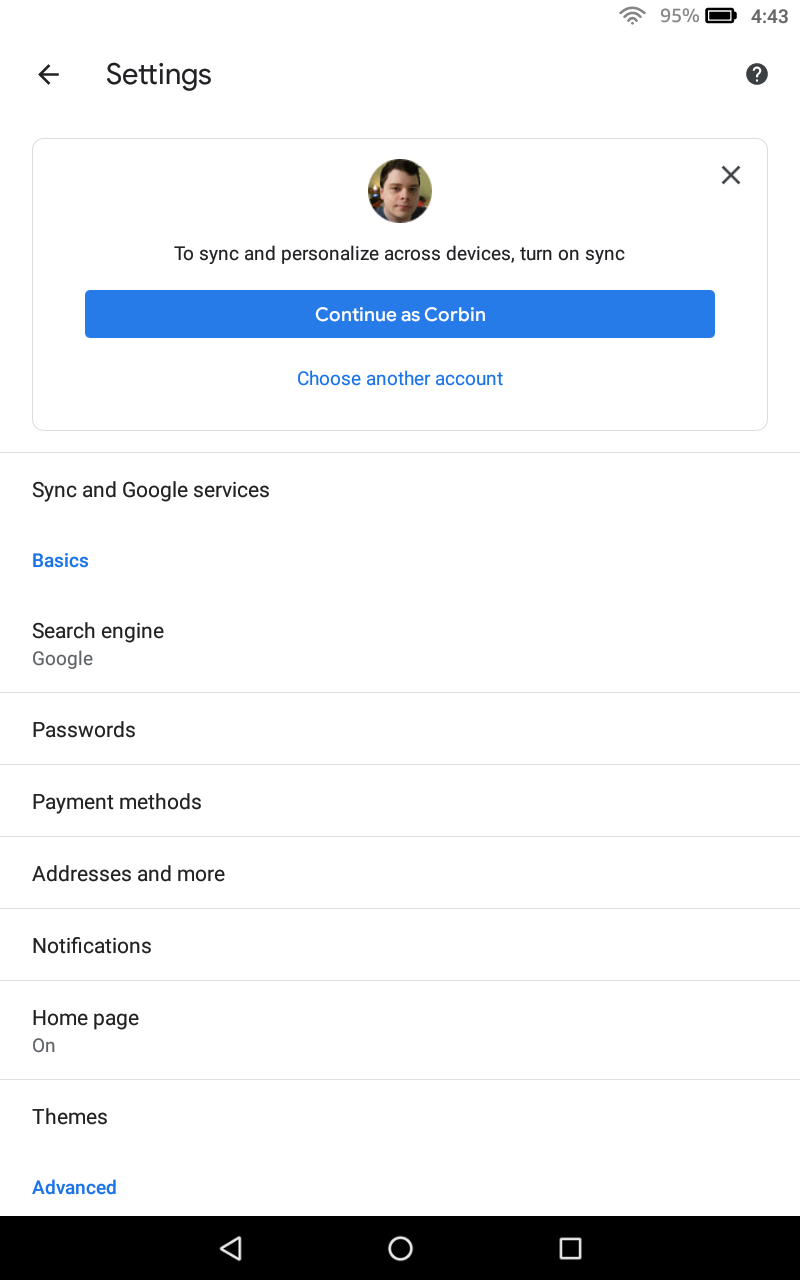
In Chrome's case, you also have to open the browser, tap on the Settings menu, and tap the 'Continue as...' blue button at the top of the screen.

Troubleshooting
If you're having a different issue than the ones listed above, here are some generic troubleshooting tips.Reboot your tablet
This might be obvious, but it's a good step to take. Hold down the power button, tap the 'Power Off' option, and turn your tablet back on by holding down the power button again. Once it has booted back up, open the Play Store from the home screen and see if it works.Clear app data
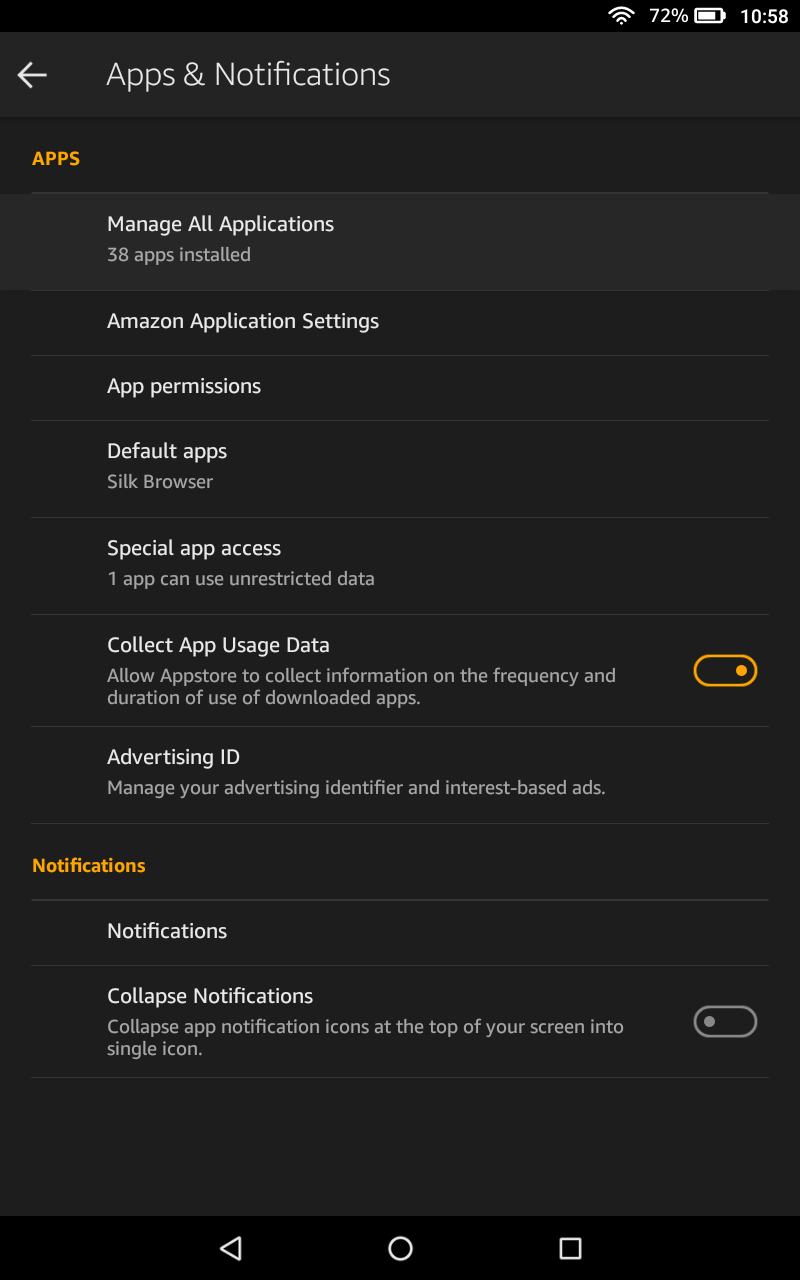
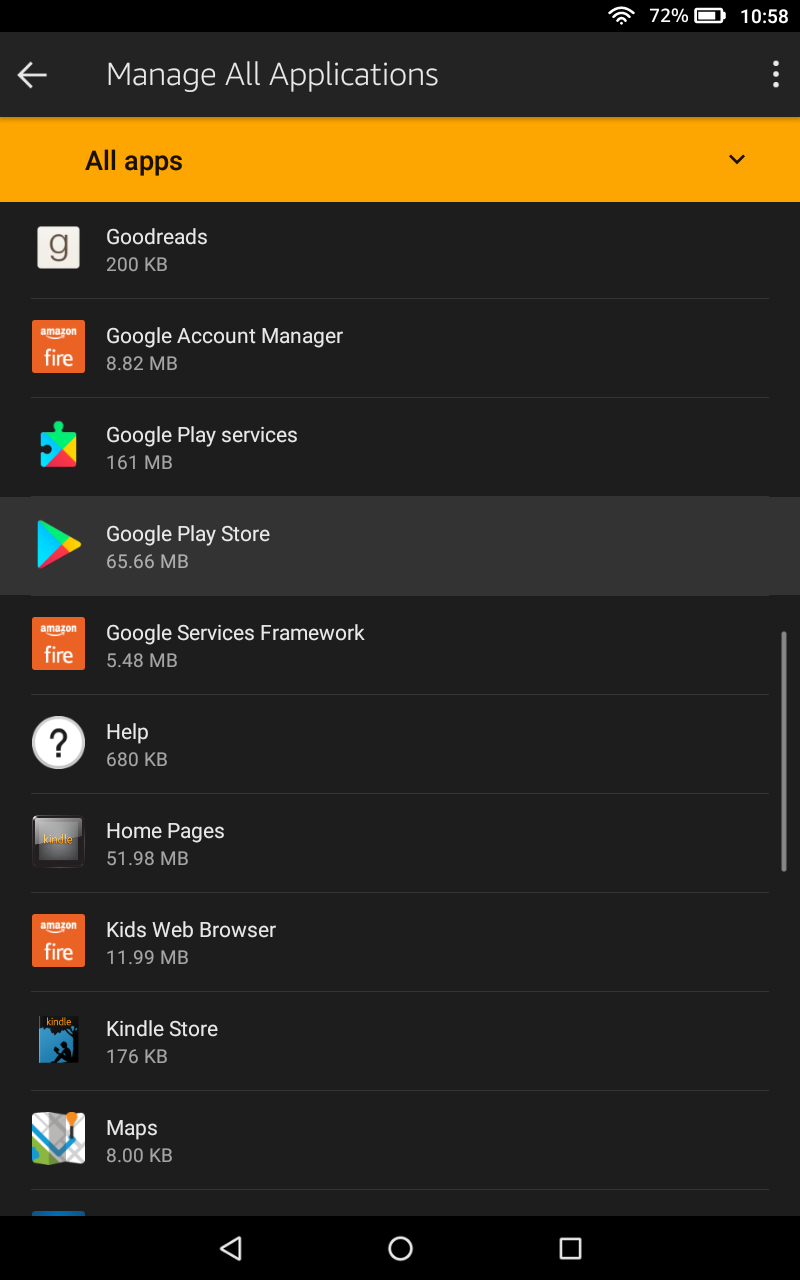
When I initially wrote this guide, I wasn't able to sign into the Play Store until I cleared the app's local data. This will essentially reset the Play Store app to its original state, and should fix most problems you might encounter.Open the Settings app, select the 'Apps & Notifications' section (or whatever else has 'Apps' or 'Applications' in the name), and tap 'Manage All Applications.' Find the Play Store in the list of apps and tap it.

 You have to perform two steps on this info screen. First, press the 'Force Stop' button to stop the Play Store from running. Then press the 'Storage' menu option and tap 'Clear Data'. Now return to the Play Store app and see if it works.If that didn't help, follow the above steps again, but restart your tablet before trying to open the Play Store. If that didn't work either, try force-stopping and clearing data for Google Play Services in addition to the Play Store.
Reset the tablet
If you still can't get the Play Store to work, your best option is probably to factory-reset your tablet and try again. Make sure you don't restore from a backup when you're setting up the tablet again, unless the backup was made before you tried to install the Play Store.Stuff to do afterwards
Congrats, your Fire tablet now has the Google Play Store! Pat yourself on the back. Now that the hard part is over, here are some things you should do or keep in mind.Disable automatic updates for Alexa
If you care at all about the Alexa functionality on your tablet, the first thing you should do after installing the Play Store is disabling automatic updates for the Alexa app. The reason for this is the Play Store will try to update the Alexa app on your tablet to the regular version, which can break some functionality. Again, if you don't care about Alexa working, this isn't a huge deal.

 To disable Play Store automatic updates for Alexa, open the Play Store app, tap the menu button at the top-left, and press 'My apps & games'. Select the Amazon Alexa app in the list (it should at least be under the 'Installed' tab), then tap the menu button at the top-right and uncheck the box for 'Enable auto-update'.
Install Google apps
Now that you have the Play Store, you can download all the Google apps you couldn't download before! Here are some suggestions — if you're reading this on your Fire tablet, the links will take you right to the app's Play Store page.Set Chrome as default browser
If you use Chrome as your main browser, you might want to install it on your Fire tablet and set it as the default browser. First, download it from the Play Store on your Fire tablet, either by searching "Chrome" on the store or by tapping the below link.Once that's done, open the Settings app and navigate to 'Apps & Notifications' > 'Default apps' > 'Browser app'. Finally, select Chrome from the list. Now all links should open in Chrome by default, and Chrome Custom Tabs should work.Install Google Play on other device profiles
Since the Play Store isn't a system-level application on Fire tablets, the install process only applies to the device profile you've been using. If you want to add the Play Store for other users on the same device, the steps are a bit different, because Amazon's Fire OS won't let you have different versions of Play Services and the Play Store installed on each profile — thanks to Florian Wolters on Stack Overflow for pointing this out.The easiest way to get the Play Store on another user profile is to extract the APKs already installed on the first profile and install them on the second profile. We only need to grab the files for Play Services and the Play Store.On the user profile that already has the Play Store:- Install ML Manager from the Play Store and open it.
- In the list of applications, find Google Play Services, and tap the 'Extract' button.
- Find Google Play Store in the list, and tap the 'Extract' button.
Now the two APKs have been saved to the 'ML Manager' folder in your tablet's internal storage. Because user profiles can't access the files from other profiles, you have to copy the two APKs somewhere else, log into the second profile, and copy them to the second profile's files. The easiest way to do this is using Firefox Send.- Open Firefox Send (send.firefox.com) on your tablet's browser (Silk, Chrome, whatever).
- Tap the 'Select files' button, tap the menu button on the right, and select 'Show internal storage'.
- While still in the file browser, open the left side menu and select your tablet (it should be the only item that says how much storage is remaining).
- Open the ML Manager folder, hold down on one of the files until '1 selected' appears, then tap the second file. It should say '2 selected' at the top.
- Tap the Upload button.
- When the files have finished uploading, you'll get a link. You'll need to open that link on the second profile, so write it down, email it to the other user, log into Google Keep on the web and put it in a note, whatever works best for you.
Now you have everything you need, so it's time to switch to the other user profile.On the user profile that doesn't have the Play Store:- Open the web browser and go to the link you got in the previous step.
- Download the ZIP file with the two APKs inside.
- Open the Amazon Appstore, search for 'ES File Explorer,' and download it.
Now, go back to the very start of this guide, and follow the instructions just like before. When you get to the steps where you have to download APKs, only download and install the first two items — Google Account Manager and Google Services Framework. Once you install those two apps, you need to install the APKs you just copied from the first profile.- Open ES File Manager from the home screen.
- Tap on the menu button at the top-left, tap 'Local', and tap 'Download'.
- Tap the ZIP file you downloaded earlier (it's probably called 'Send-Archive').
- You should see two APKs. Just like before, these have to be installed in the correct order.
- Tap the one that starts with 'com.google.android.gms' (this one is Google Play Services), then tap 'Install'.
- Now tap the one that starts with 'com.android.vending' (this one is the Play Store), then tap 'Install'.
Now reboot your tablet again, log into the second profile, and see if the Play Store works. If you encounter issues, take a look at the Troubleshooting section above.
There you have it — the ultimate guide to installing the Google Play Store on Amazon's Fire tablets. If you're having troubles, leave a comment, and we'll do our best to help. Your feedback might even help us improve this guide!


ReplyDeleteI am here to help you related to any issue for Alexa like Alexa downloading, installing, updating etc. Feel free to visit my profile or contact me. help section of alexa app
download alexa app for pc
alexa app for mac
Thanks for your interest
DeleteWoooww it was really great to have a look on your blog about alexa. Thanks for sharing with us. download alexa app
ReplyDeleteWoooww it was really great to have a look on your blog about alexa. Thanks for sharing with us. Download alexa app for pc | Download alexa app for mac | Download Alexa App For Free (2020)
ReplyDeleteThanks for sharing with us. Keep it up.Download alexa app for windows pc | Help to setup echo - Alexa app section | Download alexa app for echo dot setup
ReplyDelete