GeForce Experience: how to download, record gameplay and update your drivers
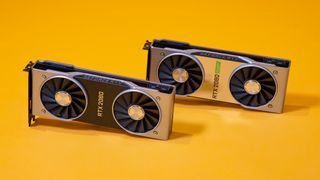
Nvidia GeForce Experience is an incredibly powerful (and convenient) piece of software – and you likely already have it installed on your computer. This is because the GeForce Experience is usually installed when you first download drivers for your Nvidia graphics card.
However, this piece of software has evolved so much over the last few years, both in its general user interface and in the scope of what it can do. Whether you just want a frame rate counter in the top left corner of your screen, a place to download new drivers when they come out or just record your gameplay, GeForce Experience can do it all.
Because of the many things this software can do, it can be hard to get to grips with everything you can do with it. So, we went ahead and put together a little guide for you, so you know exactly how you can utilize this software best and to your advantage. We'll even help you figure out where to download it if your drivers didn't come with it.
One thing to note before we begin though: this software only works with Nvidia GPUs, so if you have Radeon graphics, you're out of luck.
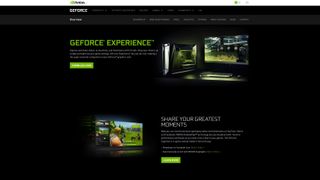
How to download GeForce Experience
If your graphics driver didn't come with Nvidia's GeForce Experience, don't worry: you can download it manually. All you have to do is go to the Nvidia GeForce Experience page, and click 'Download Now'.
Once it's done downloading, go ahead and run the GeForce Experience .exe file to start its installation. Once the program is installed, you'll either have to create an Nvidia account, or log in with your existing one. Luckily, you can sign in with either Facebook or Google to quickly setup that account if you don’t have it.
When done, a dialogue box will open up, prompting you to take a tour. If this is your first time with GeForce Experience, we highly recommend going through it so you can familiarize yourself with the software’s many features. However, it isn't totally necessary. If you don’t have the time, you can skip this part.
How to install graphics drivers with GeForce Experience
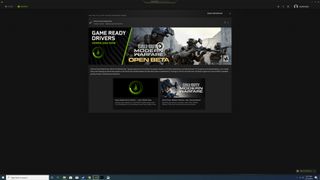
One of the best things about the GeForce Experience is that new graphics drivers are always only a couple of clicks away. Nvidia will put out new graphics drivers every couple of weeks for major game releases, so it’s definitely a good idea to check in regularly to make sure your drivers are up to date.
With GeForce Experience, it's extremely easy to do this. Just open the program, click the 'Drivers' tab and click the "check for updates" button. Usually, GeForce Experience will automatically check for new updates, but it never hurts to take that extra step to check yourself.
If your graphics driver is up to date, you'll see a message at the top of the screen that says so. If not, you'll see a message that mentions the latest driver with a big green 'Download' button next to it. All you need to do is click that and wait for the driver to download. Once the driver download has completed, two more buttons will appear: "Express Installation" and "Custom Installation". For most users, we recommend going with the "Express Installation".
Installing your driver will take a few minutes depending on your hardware, and you may need to restart your PC when it's done. After that, congratulations, you've updated your graphics card driver.
How to optimize your games with GeForce Experience
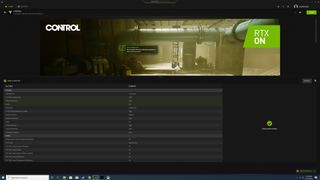
The capability to download drivers on GeForce Experience is definitely enough for us to always have the program installed. However, if you need another reason, there's another marquee feature you’ll definitely going to appreciate: game optimization. With GeForce Experience, you can optimize your games with a mere click of the button. This means that you can get the best balance of performance and visual quality without spending an hour toiling over graphics options.
The best part is that when you open GeForce Experience, it will scan your PC for installed PC games automatically, and new games will be added to your library. And, if you don't want to wait for the next time you open GeForce Experience, you also have the option to do a manual scan by clicking the three vertical dots in the top right-hand corner and selecting "Scan for games".
When the game you want to optimize is in your GeForce Experience game library, simply hover over it with your mouse and select "Details". Here, you'll see all the in-game settings and their current value, along with the recommended value for each. If you want to quickly and easily optimize the game, just click the "Optimize" button. It will then automatically change all the settings to the values recommended by the software.
You can further refine how these settings are optimized by clicking the little wrench icon and choosing your resolution, display mode, and the position on the slider between quality and performance.
If you just don't have time for any of this, you can simply click the three vertical dots in the top right corner of the library screen and select "Optimize all games" to get it all done automatically. Pretty nifty, isn’t it?
How to use GeForce Experience to record your gameplay
If you want to record an entire gameplay walkthrough, or even just capture that killstreak you just achieved, GeForce Experience will get it done.
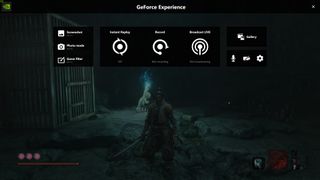
Once you're in-game, just hit the GeForce Experience hotkey – Alt+Z by default – and the GeForce Experience overlay will appear on screen. Once that's open, you'll see several options appear.
With Instant Replay, Nvidia ShadowPlay will record the last several minutes of gameplay when you hit a certain hotkey. You can open the settings to personalize Instant Replay, changing the amount of time captured, the quality of the video, resolution, frame rate and bitrate. We recommend leaving most of the settings the way they are, and only changing the amount of time recorded. If you want to save a clip of your gameplay, simply hit Alt+F10 by default, and it will save it to the gallery.
If you want to manually record your gameplay, you may do so with GeForce Experience, as well. Just click the record option in the GeForce Experience overlay, and you'll be able to start the recording. If you just want to use a hotkey without going into the overlay, you can do that too, by hitting Alt+F9 by default.
Finally, you can stream using GeForce Experience. You'll be able to broadcast your gameplay to Facebook, Twitch or YouTube. You can also customize your broadcast settings by clicking the 'Broadcast LIVE' button, and then hitting Settings. The settings aren't as comprehensive as something like OBS or XSplit, but GeForce Experience has the benefit of being extremely easy to use. Once you've configured your stream settings, you can start broadcasting by clicking 'Start' or hitting the hotkey Alt+F8.
And, of course, you can take screenshots with GeForce Experience. You can capture a simple screen grab with Alt+F1, but if you really want to take things to another level, you're going to want to use photo mode.
You can enter photo mode by hitting Alt+F1 or selecting the 'Photo mode' option in the GeForce Experience overlay. In this mode, you can add filters and even upscale your screenshot in a higher resolution using AI. That's not all, in certain games, you can use Nvidia Ansel technology to move the camera to capture the best image possible.

Comments
Post a Comment